This support article guides you through the process of changing a user’s role. Role management is crucial for maintaining the integrity and workflow of educational environments, and our system allows for flexibility in user roles.
Step-by-Step Guide
Accessing the Users Page
- Navigate to the Users Page: The first step in changing a user’s role is to locate and access the Users page. This can typically be found on the dashboard or within the main menu.
Downgrading a User
- Downgrade the User:
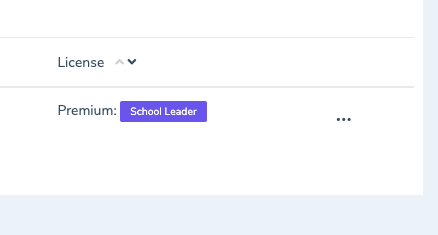
Locate the user whose role you wish to change.
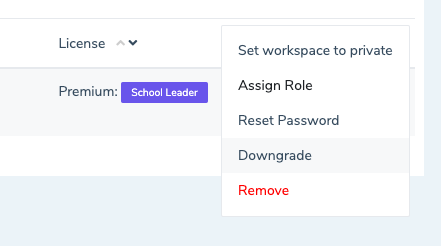
Click on the three dots (often referred to as the “more” button) to the right of the user’s information.

Select Downgrade User from the dropdown menu. This will revert the user to a basic user level, allowing you to then upgrade them to a new role.

Upgrading a User
- Upgrade to a New Role:
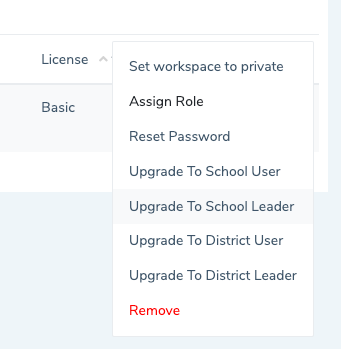
- After downgrading, click on the three dots again next to the same user.

- A dropdown menu will appear with different roles. Click on Upgrade to and select the appropriate role for the user
See more about user roles here
Additional Information
- Confirm the Change: After selecting the new role, confirm the upgrade. The user’s profile should now reflect the new role assignment.
- User Permissions: Keep in mind that changing a user’s role will modify their permissions. Ensure you select the role that best aligns with the user’s responsibilities.
Conclusion
Changing a user’s role is a straightforward process: Access the Users page, downgrade the user, and then upgrade them to the new desired role. Should you need further assistance or have any questions regarding user role management, please contact our support team.
Remember, it’s essential to regularly review and manage user roles to ensure everyone has the appropriate access for their function within the educational institution.
