A good walkthrough template is the difference between notes that pile up and evidence you can act on. The leadership team at a middle school decides this year’s instructional rounds will look for three things, checks for understanding, student talk, and the posted objective, and builds a template that asks exactly that and nothing else. Every observer sees the same questions, every visit lands in the same reports, and the data at the end of the semester means something.
The Template Builder is where you make that. This article walks through building a template from scratch on the web dashboard. Templates are built on the web and used on both the web and the mobile app.
Start a template
- Open Templates and click Create Template.
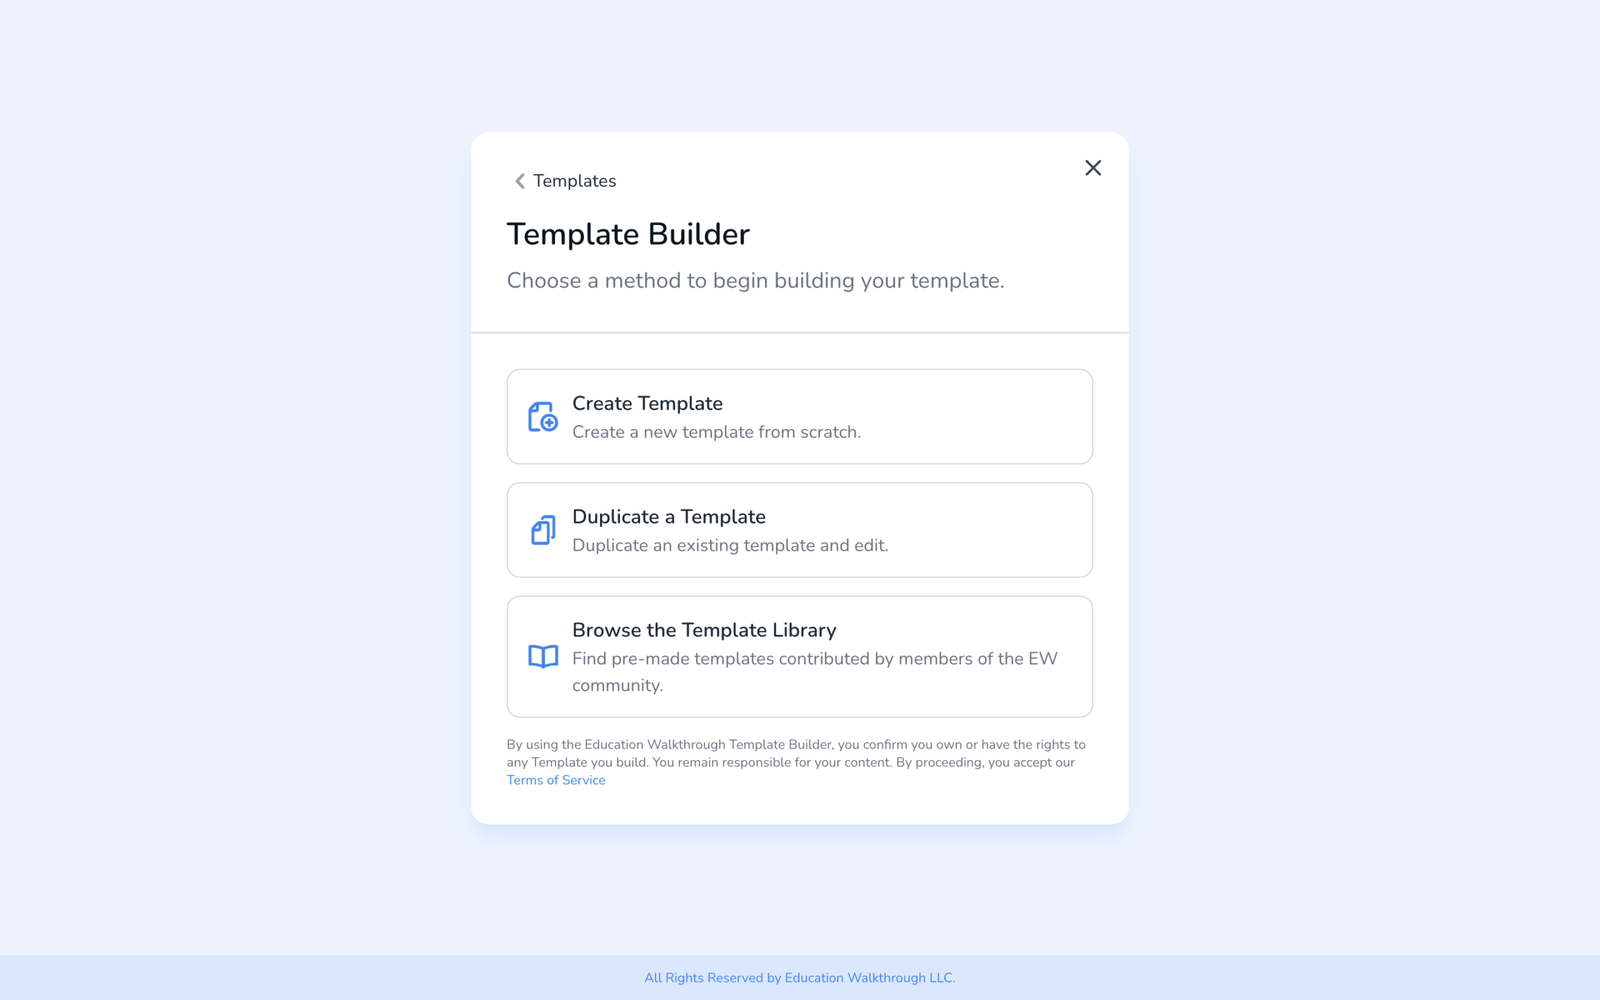
- Choose how to begin. Create Template starts from scratch. Duplicate a Template copies one you already have. Browse the Template Library starts from a template shared by the Education Walkthrough community.
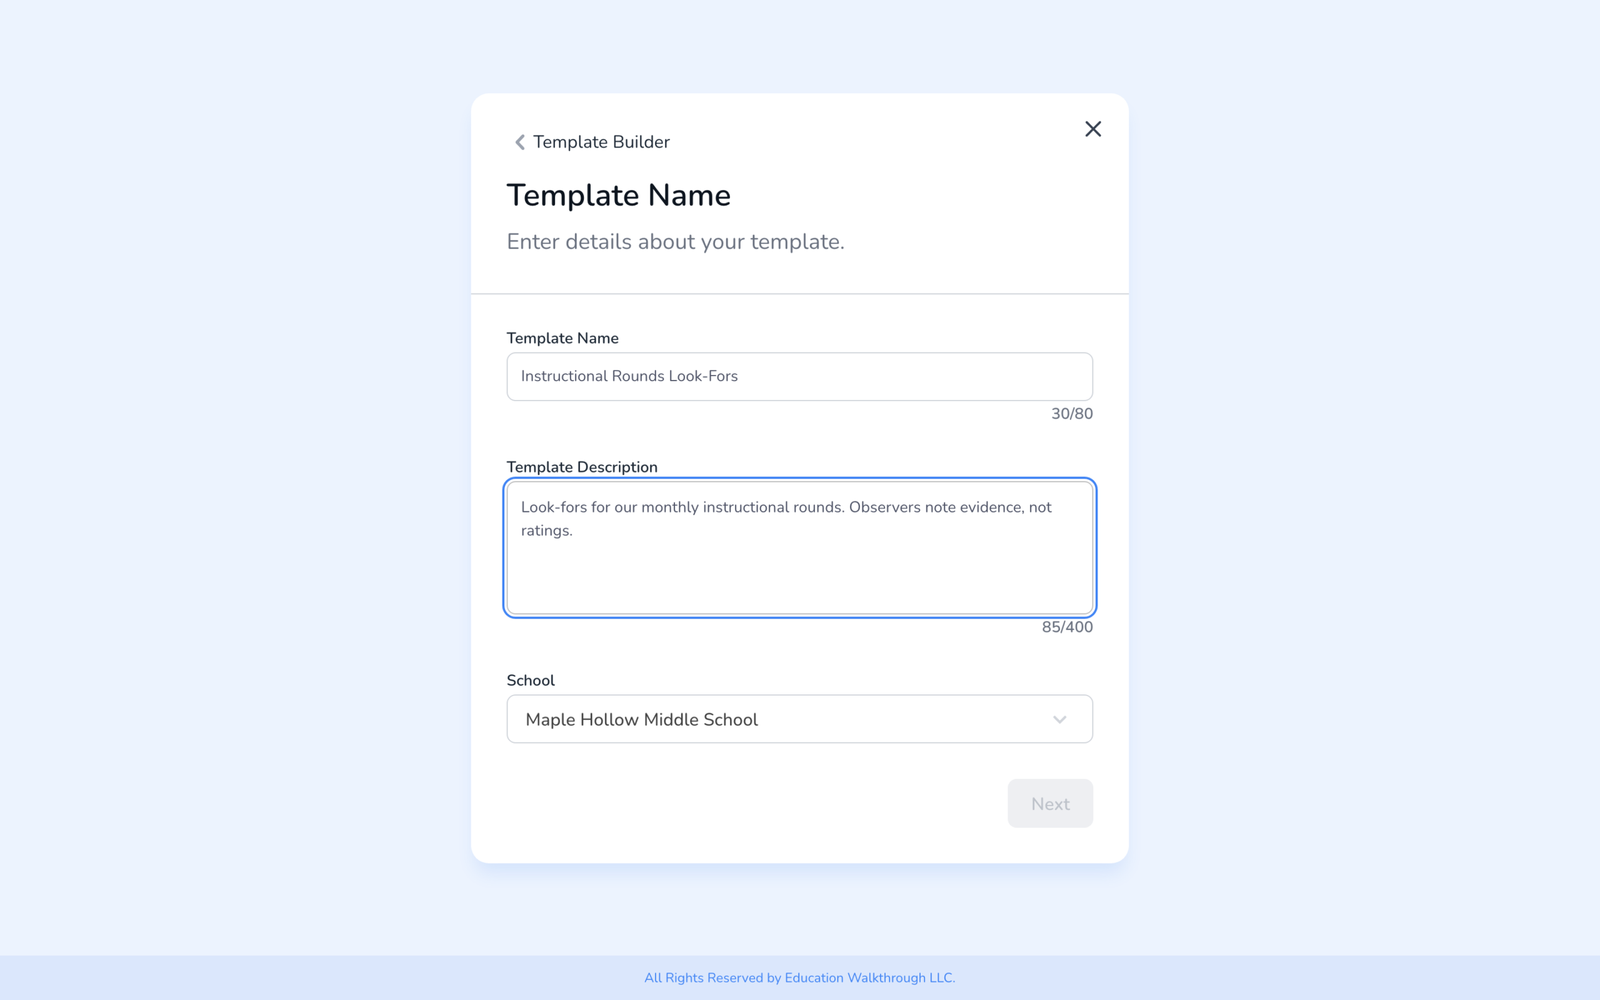
- Enter a Template Name (up to 80 characters) and a Template Description (up to 400). District users also pick the School the template belongs to. Click Next.
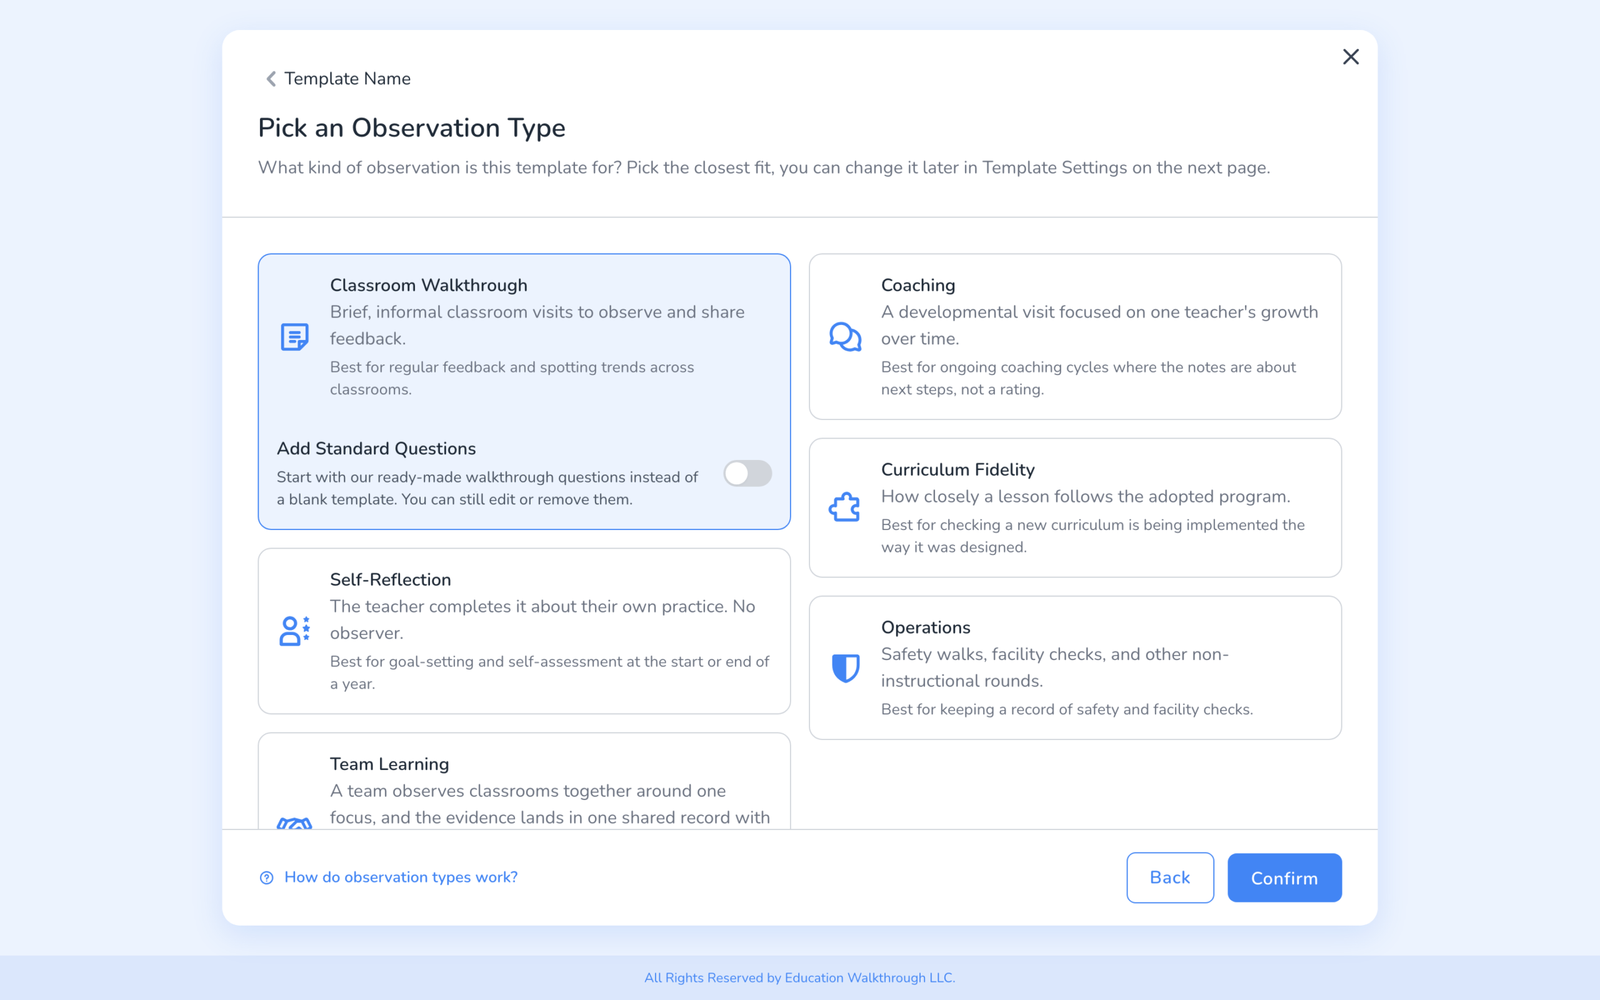
- On Pick an Observation Type, choose the card that fits and click Confirm. The type sets up what observers are asked when they start and which reports the results feed. Observation Types: Which One to Pick explains each one.
Build the questions
The builder opens on the Build tab with one section ready. Your draft saves itself as you work, and the time of the last save shows at the top right next to Save and Close and Publish.
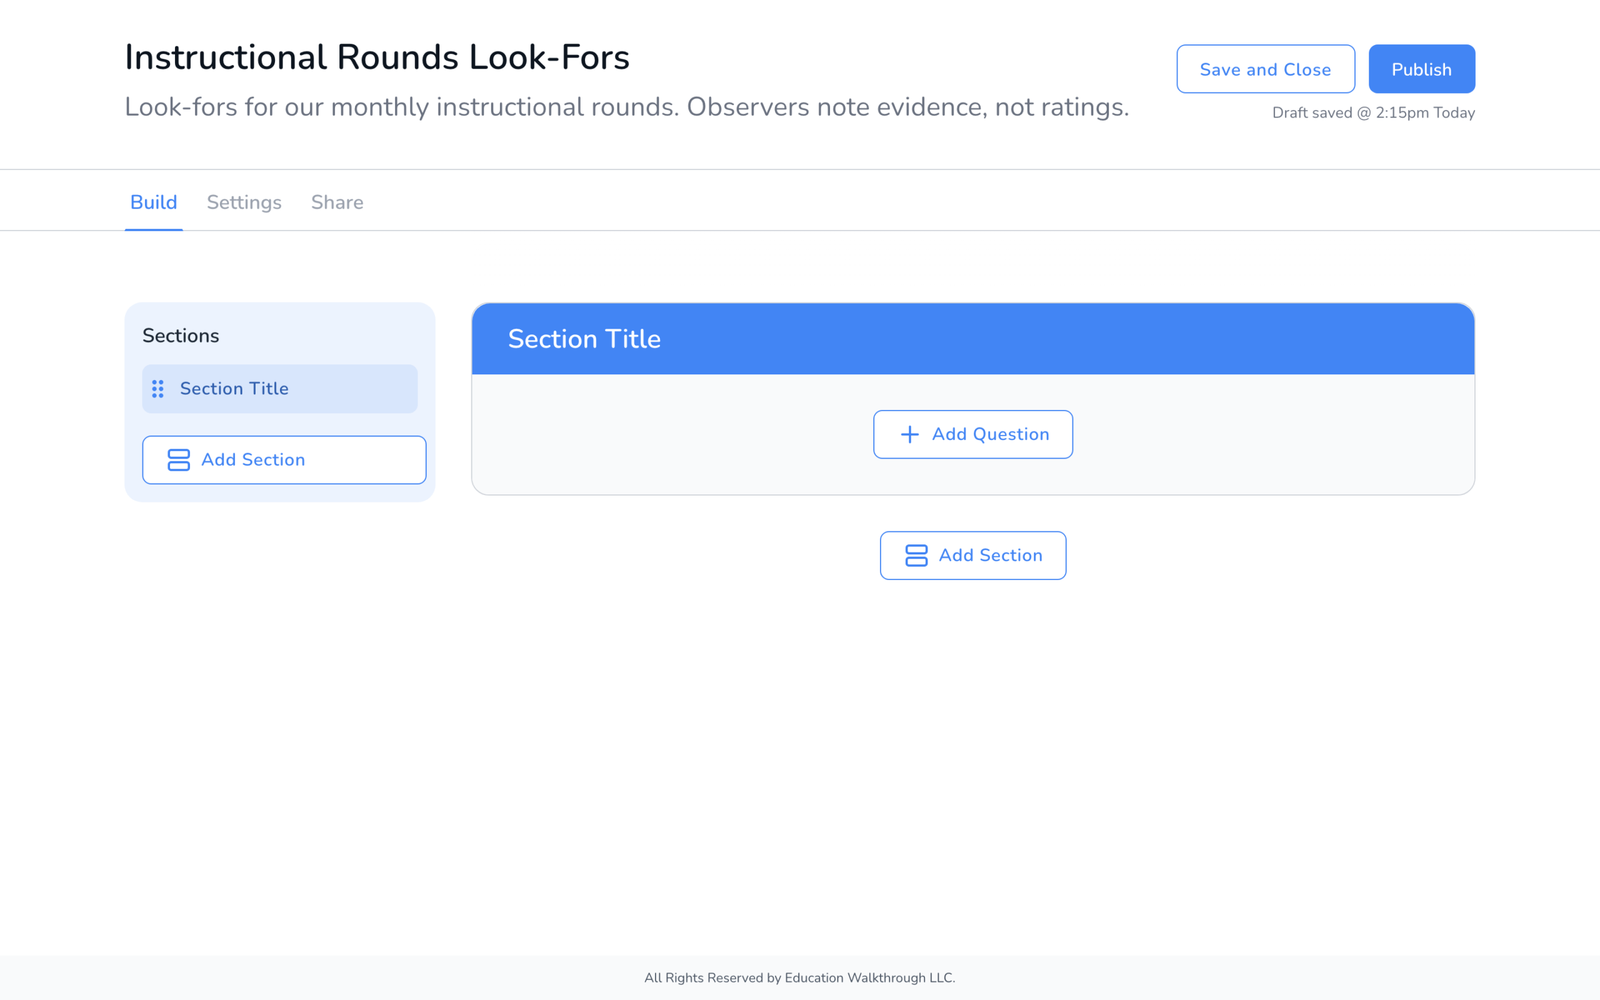
- Sections group questions, for example one per domain of your framework. Click the section title to rename it, Add Section to add another, and drag the handle in the left list to reorder.
- Add Question opens the question picker. Set a number next to a type to add several at once.
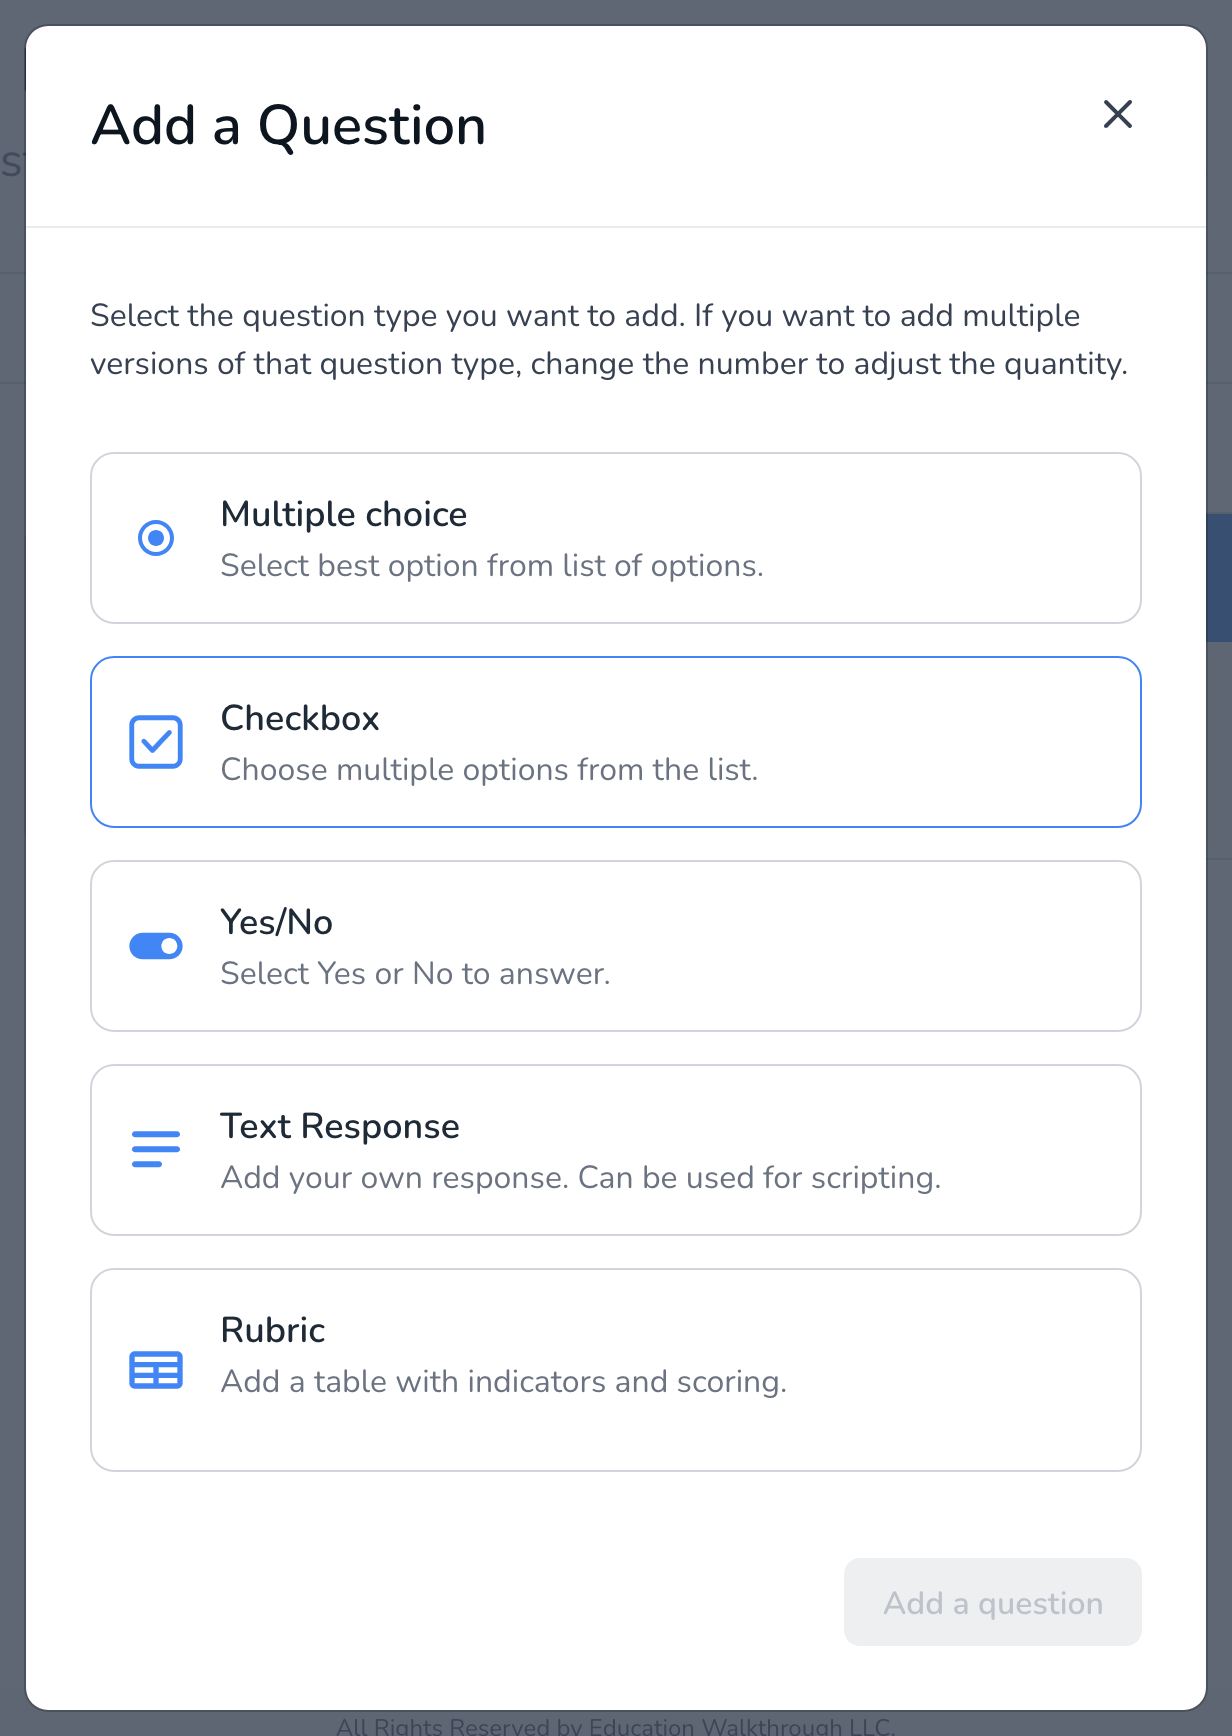
The six question types:
- Multiple choice. The observer picks one option. Options can carry weights for scoring, see How to Assign Weights to Template Question Options.
- Checkbox. The observer picks any number of options. Good for look-for lists.
- Yes/No. One quick call.
- Text Response. Free text. Use it for scripting what you see and hear.
- Rubric. A table of indicators scored against levels, up to twenty indicators. The observer marks one level per row.
- Information. Not a question. Notes that guide the observer, such as what to look for in this section.
Click a question’s title to edit its text and options. To change the order, see Rearrange Questions on a Template.
Settings
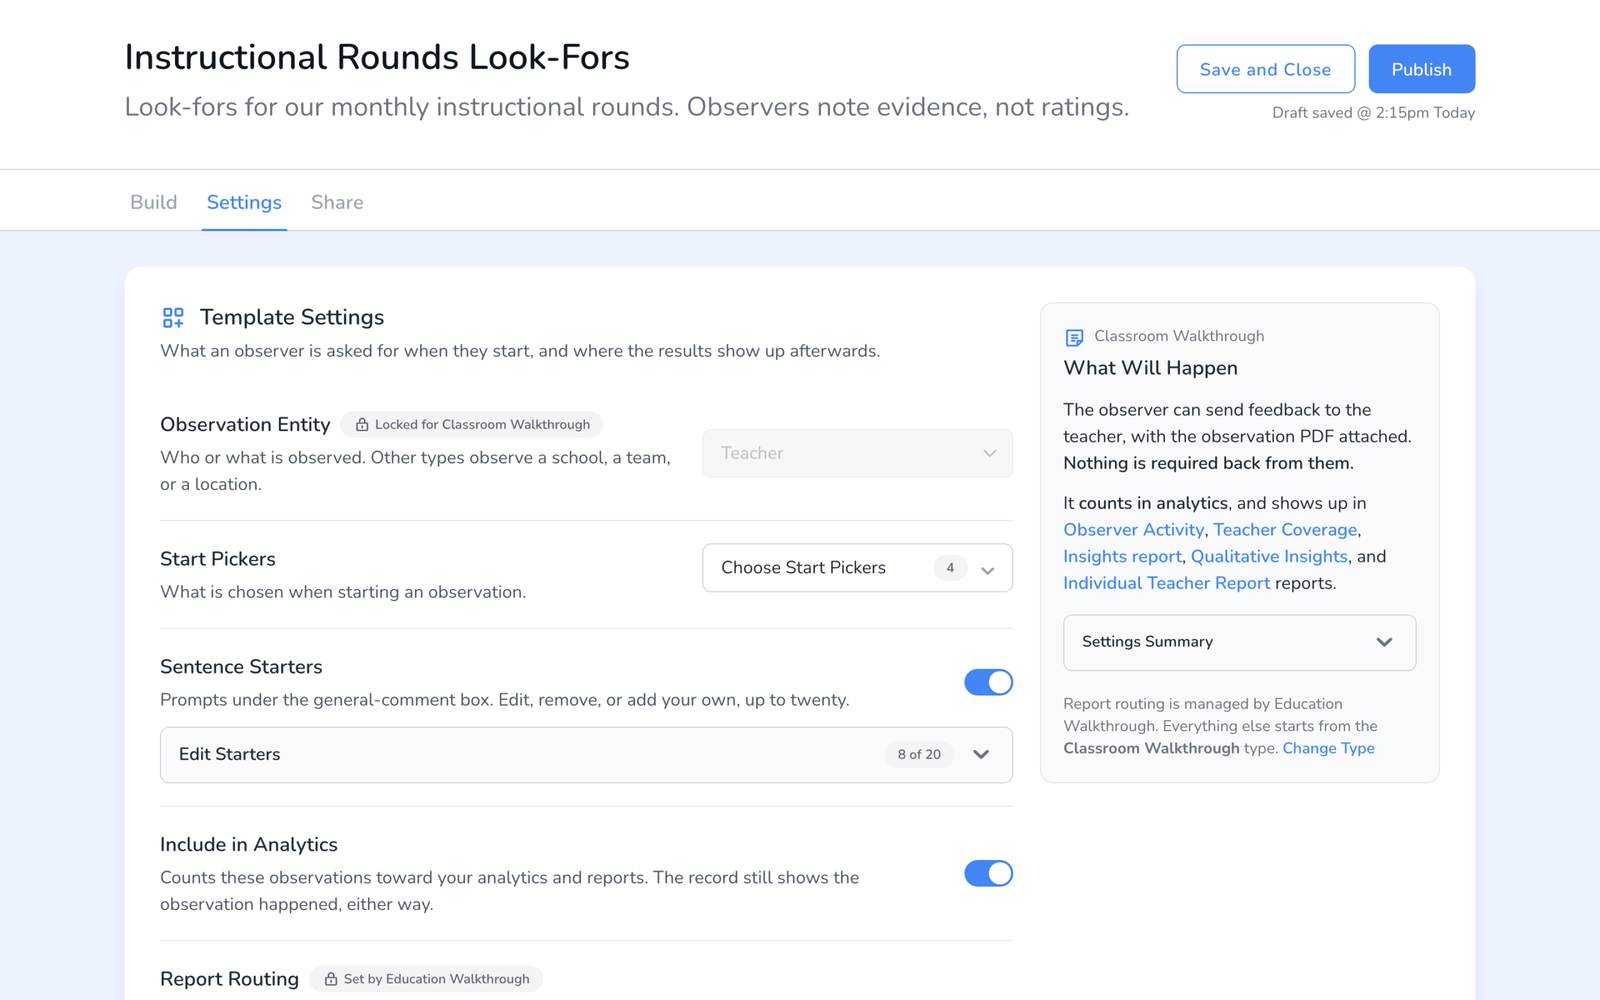
The Settings tab controls what an observer is asked for when they start and where the results go afterward. Most of it is set by the observation type you chose. The parts you decide:
- Start Pickers. What the observer chooses before the visit begins, such as the teacher, class, and subject.
- Sentence Starters. Prompts under the general comment box. Edit the defaults or add your own, up to twenty.
- Include in Analytics. Whether these observations count toward analytics and reports. The record of the visit exists either way.
- Email Recipient. Who the completed observation goes to by default when the observer sends it: the teacher, the principal, or no one.
- Save a Copy to Cloud Storage. Saves the completed PDF to the observer’s Google Drive, in one folder or a folder per teacher.
- Workflow Settings. The steps teachers and observers go through. Steps with a switch, such as sending feedback with the PDF attached, can be turned off. The observation step itself always runs.
Share and publish
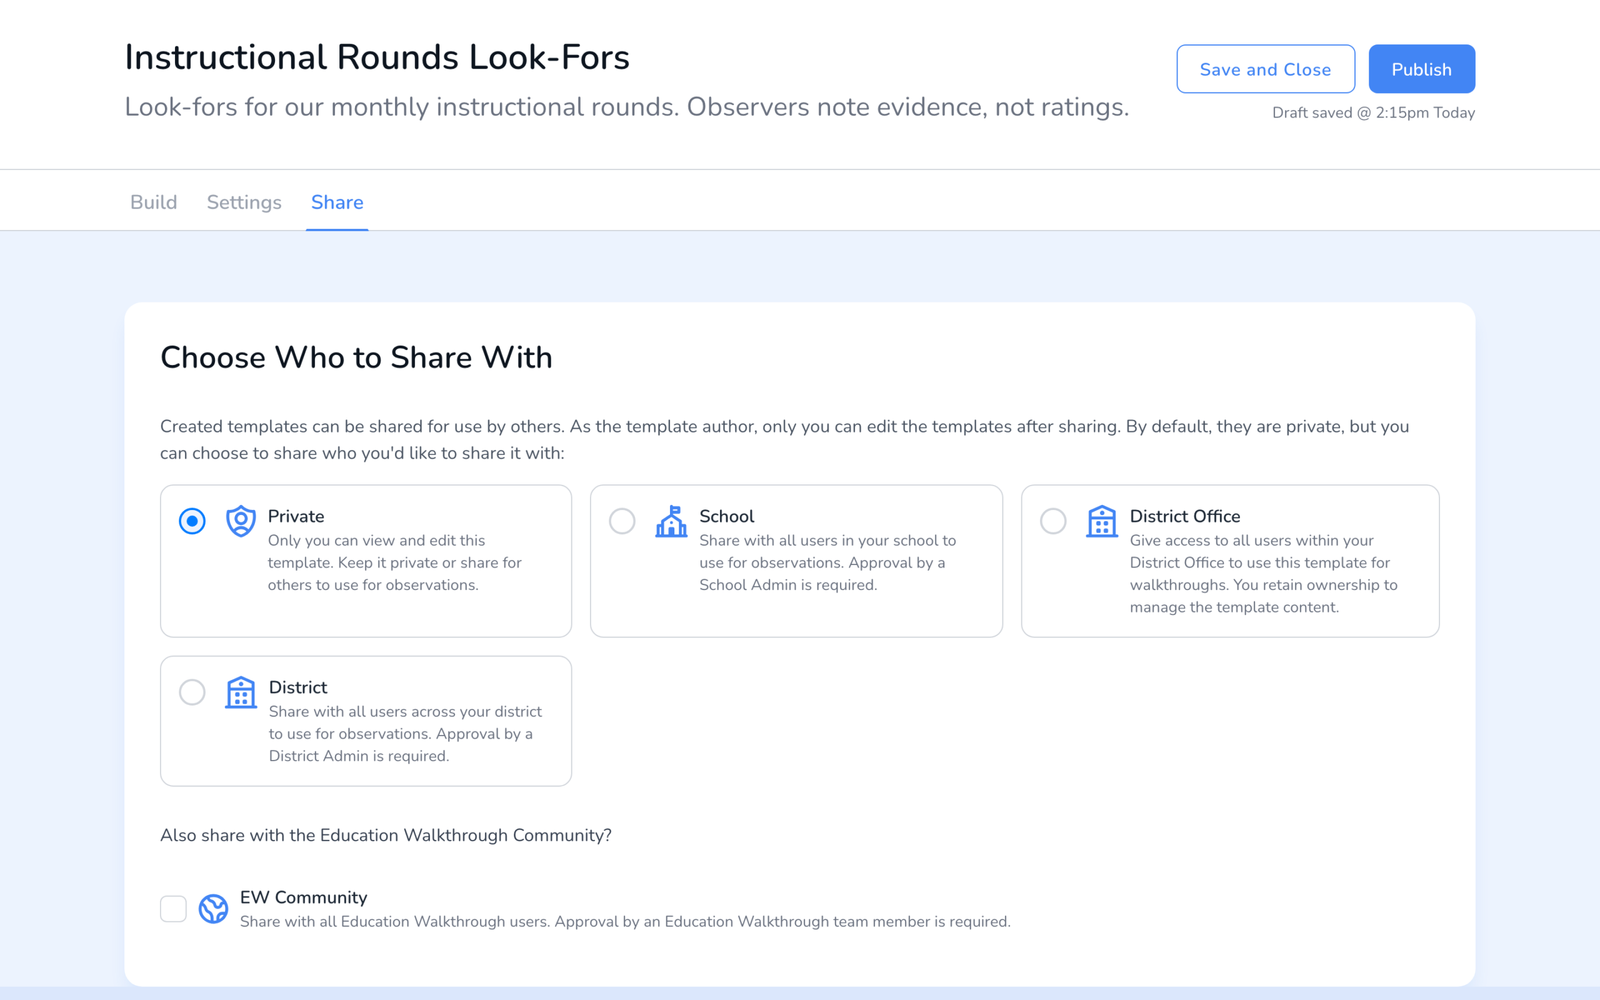
On the Share tab, decide who can use the template. Private keeps it to you. School shares it with everyone in your school, with a School Admin’s approval. District Office and District share wider, with a District Admin’s approval. You can also offer it to the EW Community, which our team reviews first. As the author, only you can edit it after sharing. More in Sharing Templates.
A template does not appear in Start Walkthrough until it is published. When the questions are ready, click Publish. How to Publish a Template covers that step, and What Happens to Your Data When You Edit a Template After Observations covers changes later on.
Frequently asked questions
Q: I picked the wrong question type.
A: Delete the question and add a new one of the right type. The type is locked once a question exists, so it is worth sketching the template on paper first.
Q: How many sections and questions can I have?
A: There is no fixed limit on sections or questions. Rubrics hold up to twenty indicators each. Long templates slow observers down, so most teams keep a walkthrough to a handful of look-fors per section.
Q: Can I build on my phone?
A: Templates are built on the web dashboard. Once published they are available in the mobile app for walkthroughs.
Q: Can other administrators edit my template?
A: No. Sharing lets others use it. Only the author edits it. Template Locking covers how admins can stop staff from creating or editing templates at all.
Q: Where did my draft go?
A: Drafts save automatically and sit on the Templates page with a Draft status. Open one to keep building. Drafts never show in Start Walkthrough until published.