
Syncing your ClassLink account with your Education Walkthrough account allows you to seamlessly import your teacher rosters. This integration streamlines data management and ensures your Education Walkthrough system is up-to-date with your current teacher assignments.
Note. This setting used to be called ClassLink Settings. It is now called Teacher Rostering, and you open it with the Edit Rostering link. Everything else about connecting and syncing works the same way.

This document provides a step-by-step guide on how to establish this connection and synchronize your data effectively. Please note that this is a premium feature, only for District Administrators on a District Premium Plan.
Steps to Connect ClassLink
1. Log into your Education Walkthrough Account
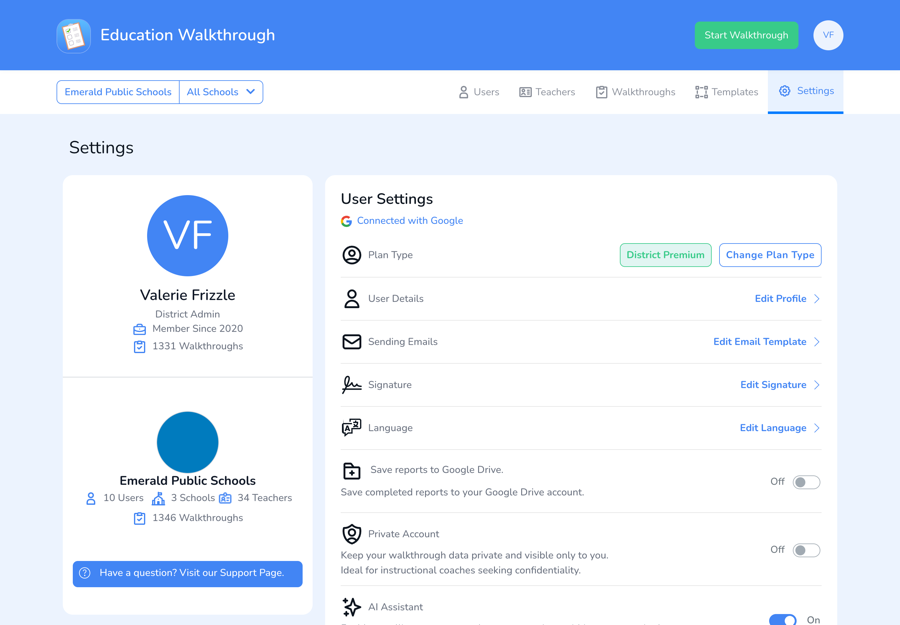
2. Click ‘Settings’
3. Scroll down to District-Wide Settings and click Edit Rostering beside Teacher Rostering
4. Click ‘Connect ClassLink’. If you’ve already signed in to your ClassLink account in another browser tab and you click ‘Connect ClassLink’ it should be successful; if so, you’ll see a green notification towards the bottom of the page which will read “Connected Successfully! Your ClassLink account is connected.”
If not, at this point you’ll need to enter the credentials.
Note: For more steps on how to set up your ClassLink SSO and OneRoster, you can read more here.
Steps to Set Up ClassLink Sync
- Click Setup Sync.
- You will see two lists, the schools ClassLink is sharing and the schools in Education Walkthrough. Schools with the same name in both systems match automatically and will not appear here. The schools listed are the ones that need a manual match, or do not exist in Education Walkthrough yet.
- Match each ClassLink school to its Education Walkthrough school, then click Map Schools. Map every school before you run the sync. Any shared school left unmapped will be created as a new school with its ClassLink name, which can produce duplicates.
- Click Done Mapping.
- Under Preview Sync, click Edit to change a selection, or click the X next to a school under Mapped Items to remove it.
- When your mapping is done, click Begin ClassLink Sync.
During the sync, Education Walkthrough adds or updates teachers by matching on email address. On later syncs, a teacher who was previously synced from ClassLink but is no longer on your shared roster will be moved to Archive, never deleted, and their walkthrough history is kept. Teachers who were never part of your ClassLink roster are not touched. If an archive is a mistake, you can unarchive the teacher.
Set up autosync – turn this on to keep your teacher lists in sync with ClassLink over time. You can also use “Force Sync Now” at any point to re-sync immediately.
Note: The sync places each teacher at their primary school in ClassLink. If a teacher works across more than one building, you can add their additional schools in Education Walkthrough afterward. Please see our sharing schools support article for more information.
You’ll notice a yellow notification bar that says “Don’t close this tab or browser until the sync is complete.” You can also see the ClassLink Sync progress bar at the bottom of the screen that reads “Data from ClassLink is syncing” with the percentage synced off to the bottom right side of the progress bar.
Once the Sync is successful, you can also enable the “AutoSync with ClassLink” button which will allow you to automatically sync your school rosters.
One last option is you can click on the “Force Sync Now” in order to immediately sync the data.
In summary, connecting and syncing your ClassLink account with Education Walkthrough ensures efficient and accurate management of your teacher rosters. By following these steps, you can streamline your data updates, automate synchronization with the AutoSync feature, or initiate manual syncs as needed. This integration simplifies administrative tasks and guarantees your Education Walkthrough system reflects the most current teacher assignments.
Preguntas frecuentes
What happens if my school names don’t match between Education Walkthrough and ClassLink?
During the “Setup Sync” process, you will see a list of schools in Education Walkthrough that could not be automatically matched with schools in ClassLink. You can manually map these schools by selecting the Education Walkthrough school name and then clicking “Map Schools” to link it to the corresponding ClassLink school. Unmapped ClassLink schools will be created in Education Walkthrough with the same name.
Can I automatically sync my school rosters with ClassLink?
Yes, once the initial sync is successful, you can enable the “AutoSync with ClassLink” button in your Education Walkthrough settings. You can also use “Force Sync Now” any time you want to re-sync immediately.
What should I do if the ClassLink Sync process gets stuck or doesn’t complete?
If the ClassLink Sync process seems stuck or does not complete, ensure you have a stable internet connection and avoid closing the browser tab. If the issue persists, contact Education Walkthrough support for assistance.