
Groups let you organize the teachers and administrators you already have in Education Walkthrough into cohorts, then look at their results together. A group might be your first-year teachers, your teacher leads, or the principals you are coaching this year.
A group works like a filter. It labels and sorts the people in your account so you can answer a question like “how are our first-year teachers doing” in one click, instead of pulling a separate report for each person. Creating, archiving or deleting a group never changes the underlying observation data, and teachers are never emailed or notified that they are in one.
What groups are for, and what they are not for
Education Walkthrough already sorts your observations by the things every school keeps track of, such as School, Department, Grade and Template. Groups are not meant to repeat those. If you can already filter by it, you do not need a group for it.
Groups are for the cohorts that your data does not already describe. Your first-year teachers, the eight teachers in a coaching cycle, the teachers piloting a new curriculum, your instructional leadership team. None of those are fields in the system, so a group is how you name that set of people and filter by it later.
A good test is to ask whether the group would still make sense to someone reading your roster. If the answer is “these are just the third grade teachers”, use the Grade filter instead. If the answer is “these are the teachers I am coaching this semester”, that is a group.
The two kinds of group
- Teacher Groups are created from the Teachers page. For example first-year teachers, teacher leads, or student teachers.
- User Groups are created from the Users page. For example first-year principals or veteran principals.
Both work the same way, so the steps below apply to either page.
Who can create a group
Groups follow the permissions of the page they are created from, so you do not get any access through a group that you did not already have.
- Teacher Groups. Anyone who can open the Teachers page can create them, which covers administrators and leaders.
- User Groups. These are created from the Users page, so they need the administrator level of access that page requires. A leader who does not have the Users page will not see the option.
- Your scope still applies. You can only add people you can already see. A School Admin groups teachers in their own school, while a District Admin can group teachers across the schools in their district.
The same rule governs managing an existing group. A group can be edited and removed by the person who created it, plus any administrator at or above the level it was created at who can see it.
How to create a group
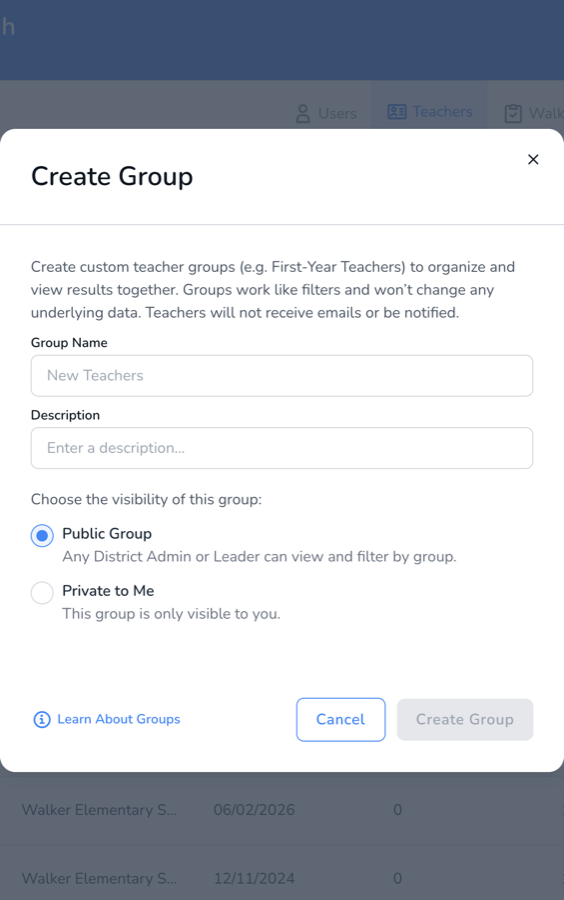
- Go to Teachers (or Users), click Add Group, then choose Add Group from the menu.
- Enter a Group Name, and a Description if you want one.
- Choose the visibility of the group, either Public Group or Private to Me.
- Click Create Group.
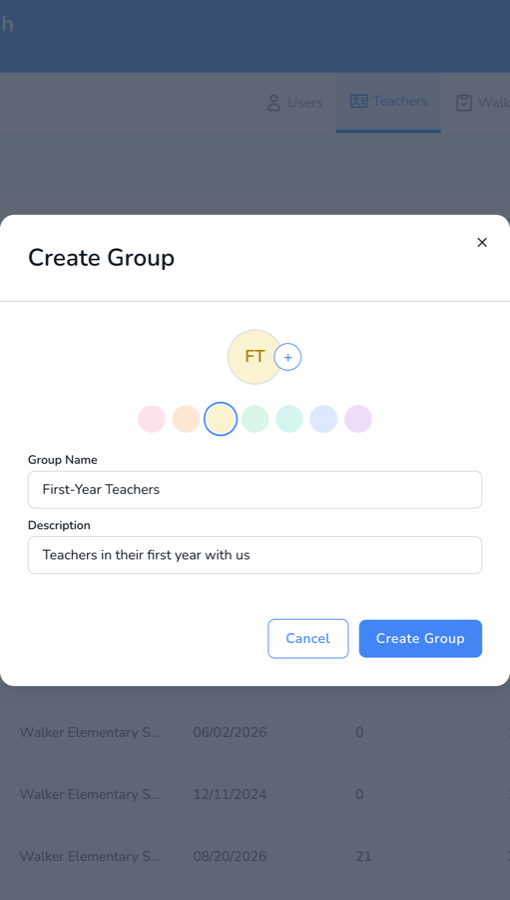
- Pick a color for the group avatar. The initials are taken from the group name, so “First-Year Teachers” becomes FT.
- Click Create Group again to finish.
Choosing who can see the group
- Public Group. Any District Admin or Leader can view the group and filter by it.
- Private to Me. The group is only visible to you.
You can change the visibility later from the Edit Group screen.
Adding and removing members
Members are added after the group exists, not while you are creating it.
- Click Add Group, then Manage Groups.
- Find your group in the list and click Manage.
- Click Add Group Members, click Add beside each person you want, then click Save.
- To take someone out, click Remove beside their name.
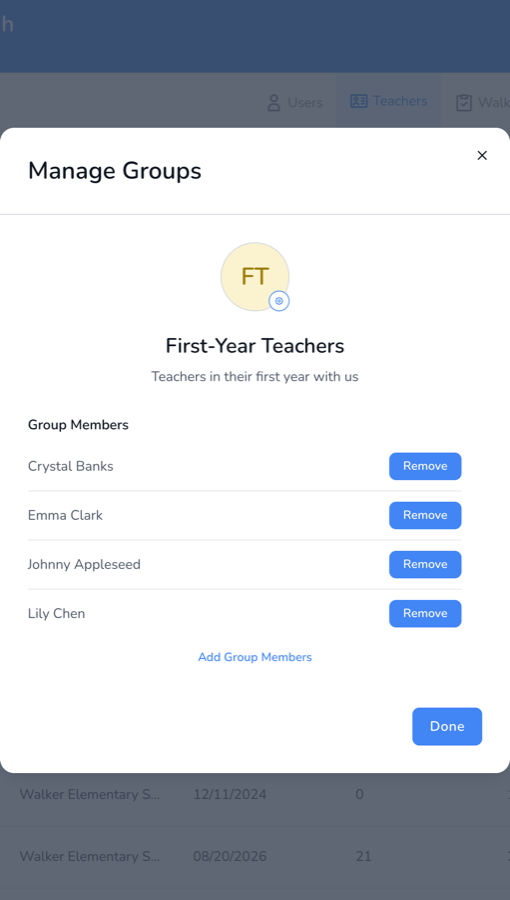
A teacher or administrator can belong to more than one group at the same time, so a first-year teacher can also sit in a science department group.
You can also select people straight from the table. Check the rows you want on the Teachers or Users page, then use Create Group or Add to Group.
Where your groups show up
Once a group exists, it appears in a few places around the dashboard.
- A colored badge in the Groups column of the Teachers and Users tables.
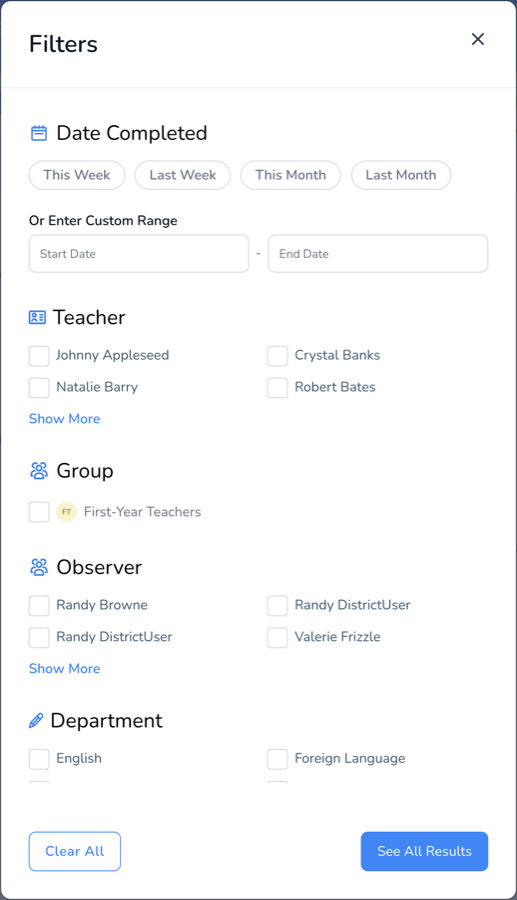
- A Group section in the Filters panel, for example on the Teachers and Walkthroughs pages.
- The expanded view of a walkthrough, which lists the groups that teacher belongs to.
- The Teachers/Groups filter on Analyze Data, so you can run your analytics on a whole cohort at once.
- The Filter by group step when you build a report, so a report can cover just that cohort.
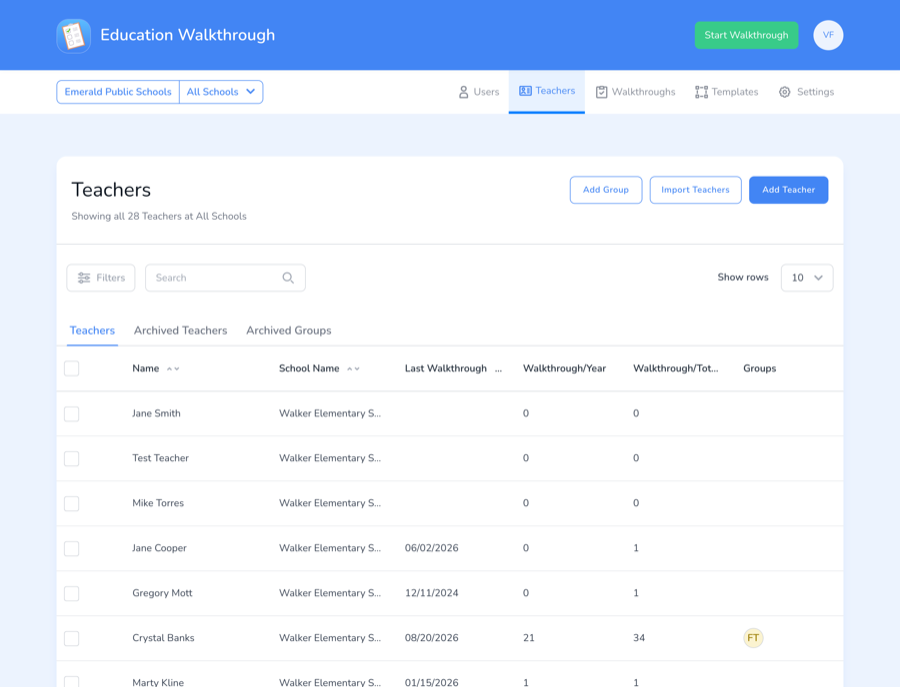
The Group filter only appears once you have at least one group, so if you do not see it yet, create a group first.
Using a group in analytics and reports
This is where a group earns its keep. Instead of picking teachers one at a time, you pick the group once and every number on the page is for that cohort.
- Go to Walkthroughs, then Analyze Data.
- Open the Teachers/Groups filter. Your groups are listed under a Groups heading at the top, above the individual teachers.
- Choose your group and click Submit.
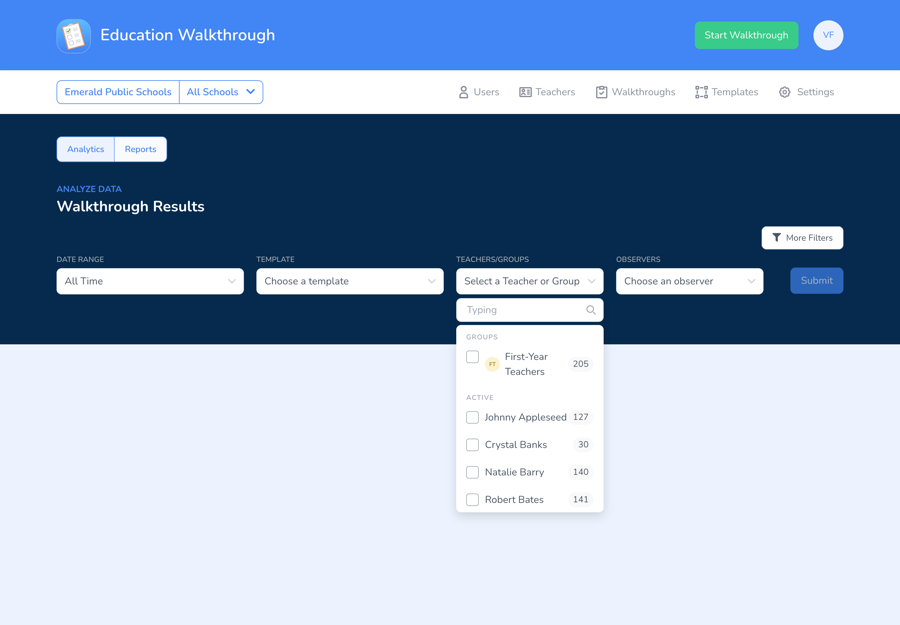
The number beside each group and teacher is how many walkthroughs sit behind that choice, so you can see at a glance whether there is enough data to be worth analyzing.
Reports work the same way. On the Reports tab, choose a report template and use Filter by group to narrow the report to one or more groups.
Editing, archiving and deleting a group
- Open Add Group, then Manage Groups, and click Manage on the group.
- Click the gear icon on the group avatar to open Edit Group.
- Change the name, description, color or visibility, then click Save.
- To get rid of the group, click Remove Group, then choose Archive or Delete.
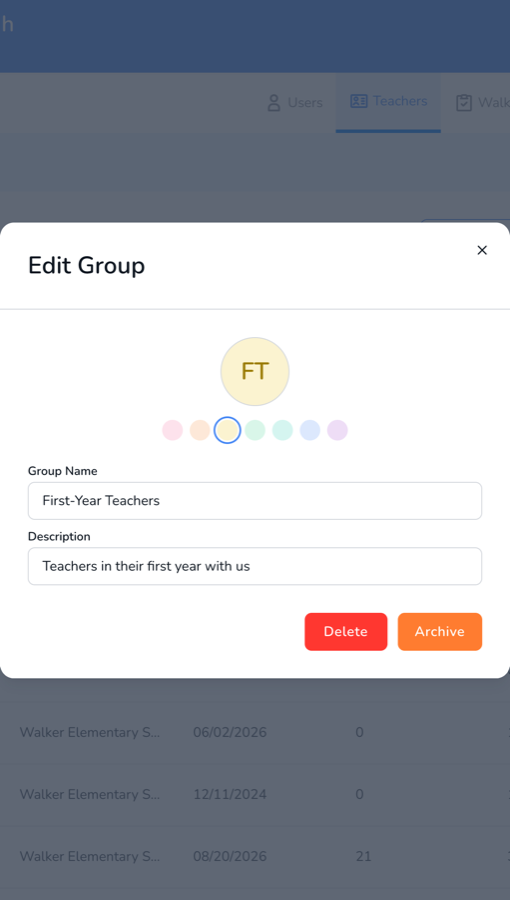
Archive moves the group to the Archived Groups tab so you can find it later. Delete removes it for good. In both cases only the grouping goes away. The teachers, their walkthroughs and all of your analytics stay exactly as they were.
Frequently asked questions
Do teachers know they have been put in a group?
No. Groups are an organizing layer for administrators. Teachers do not receive an email and are not notified.
Can someone be in more than one group?
Yes. A teacher or administrator can belong to as many groups as you need, and every group they are in shows as a badge on their row.
What happens to my data if I delete a group?
Nothing is lost. Deleting a group removes the grouping only. Every walkthrough, report and analytic stays in place.
Why can I not see the Group filter?
The Group filter only appears once at least one group exists. Create a group, then reopen the Filters panel.
Can a group include teachers from more than one school?
Yes. When you add members, the picker lists teachers across the schools you have access to, so a district group can span several schools. Cross-school groups are visible when you have the All Schools workspace selected.